Wednesday, December 29, 2010

Modeling a Low - Poly Medival Arch


This tutorial will show how I created the arched doorway that fits the four way vault. To work through this tutorial, you'll need to have the completed the four way vault modeled in this tutorial:

http://3dmedieval.blogspot.com/2010/12/modeling-low-poly-medieval-arch.html

Step 1: Open up the vault model, enter front view, and add a circle (default 32 vert).
 

Step 2: Using the 4 way vault as a reference, re-size the circle like this:


The verts in the horizontal center of the circle should line up with the top of the vault column, as in the picture above. The top center vert of the circle will not line up with the center of the arch, as we are making a gothic, or "pointed" arch. It's ok if things are not precise at this point. You can tweak things in the next few steps.

Step 3: Select all the verts, and extrude the size (E - S). Be sure that the inner circle clears the base of the four way vault as shown. In the image at the very top of this tut, I made the arch clear the base more than I did in this tutorial. This is just a matter of personal preference. Size your as you like.


Step 4: Select the verts shown and delete them.


 You should end up with this:


Step 5: Duplicate all the verts and flip them horizontally. Line up the two arches as shown.


Step 6: Select all the verts, and re-center as shown.


Step 7: Merge these two verts:


Select the two top verts, subdivide, then move the newly created vert into position to complete the arch. Make new faces as shown.


 Step 8:  Select the verts shown, and extrude down as shown.


Step 9: Enter top view, select all the verts, and extrude as shown. In this case, I extruded .5 Blender units. This is a matter of personal preference, and of course the thickness can be modified later.


Step 10: The modeling of the arch is complete. To finish it up, make sure all the face normals are pointing outward, set it smooth, and add an edge split modifier (default settings are fine). Don't apply the edge split mod, as it doubles the verts for some reason. You should end up with this:


That's it. If it serves your purpose, you can remove some unnecessary faces, as shown. These will not be visible from inside the vault.


At this point, you should have a four way vault, a straight hall section and an arch, which should all connect together nicely. It the next tutorial, I'll explain how to model a cap wall and a door.

Tuesday, December 28, 2010

Modeling a Low-Poly Medieval Vault


In this tutorial, I'll explain how I made the four way vault that is is the basis for my low poly castle. The screen-shots in this tutorial are from Blender 3d, but the modeling principles will be the same in any 3d package. Click the images to enlarge. The shortcut keys I'll be naming are based on Blender 2.5 series.


Step 1: Fire up blender, and set this  image as your background:


Step 2: Create this shape. It's best if you model one half, then duplicate and flip the verts horizontally. Be sure to join the 2 verts at the top of the arch. Re-size your arch to 4 blender units wide.


Step 3: In top view, extrude all the verts in the Y direction 4 Blender units. From the top, you should see a 4 x 4 square.

You should end up with this:


Step 4:  Enter top view, object mode. Select the arch and duplicate it. Rotate it 90 degrees:


Enter front view, and make sure the duplicated arch is still the active object.


Step 5: Enter edit mode, select all the verts on 1 side, and move them 1/2 Blender unit to the side (.5 in the x direction). The result should look like this:


Step 6: For this step, be sure that you are in wire mode. Blender can't see through shaded shapes when selecting verts. Select the top vert opposite the side you just moved 1/2 blender unit - the left side in this case - and drag it in the x direction until it lines up with the top of the first arch. If this sounds confusing, take a look at the next few images and you'll see what we are shooting for.


Continue selecting verts (use "C" circle select to make sure that you grab both verts), and moving them so that they line up with the template arch. Be really careful here, and make sure that your verts line up with the other arch exactly. Zoom in really close, or you'll be sorry later. The result should look like this:


Take a look at your progress in perspective mode. You should have something like this:


Move the original arch out of the way for now. You can use it as a straight hall way section, as it will connect with the 4 way arch we are making perfectly. You should end up with this - 1/4 of our finished 4 way arch:


Step 7: Go into top view, edit mode. Place the object center exactly at the point of the arch. Select all the verts, and rotate 90 degrees, with this result:


Step 8: Merge these verts by selecting all then removing doubles, or use center select to select the 2 verts near each other, then Ctrl M, center to merge them.You'll likely use a combination of both techniques.


Step 9: Making certain that you've got no double verts, head back to top view, select all, and rotate 90 degrees, with this result:
 

As before, remove all the double verts, any way you like. You should end up with this:


Step 10: Make sure all of your face normals point inward, thus:


Next, set the whole arch smooth, and add an edge split modifier (but don't apply it). The default 30 degrees is fine.


That's the basic 4 way arch. If you like, you can duplicate it and join the verts as before. When you join 4 together, you'll end up with this result:


The resulting geometry has some faces we don't need. Select the offending edge loops as below, and delete (delete  - edge loop).


After unnecessary edge loop removal, you'll end up with this:


At this point, you've got a hallway and a vault pattern you can use to create vaulted rooms of any size. In the next tutorial, I'll explain the construction of an arched doorway. Enjoy!


Thursday, December 9, 2010

Texturing Tips #1

Texturing  Low Poly Game Architecture


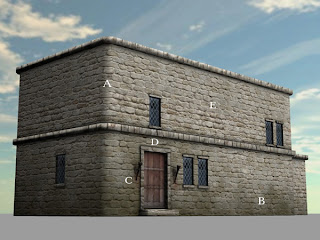
  • A Unwrap your faces in such a way that stone or bricks wrap around corners
  • B Use grunge maps, especially on the base of your building. 
  • C Use appropriate stencils - in this case, there are subtle rust stains dripping down the wall, from the rusty metal torches on the wall. A pair of rusty torches without rust stains would look odd. You can also use stencils to add the occasional crack or bit of damage.
  • D Bake ambient occlusion.
  • E Make sure that the building material you use, in this case, stone block, is scaled properly. This is especially true for things such as cinder blocks and bricks. Look up real world dimensions and set the tiling to be as close as possible.
  • E Use tiling textures for large objects, like buildings. Some people cram the whole building's worth of textures into one image, but buildings textured in this manner will look low rez up close. Besides, you can use the same tileable stone, wood, metal, grunge etc. textures for the whole town. It makes sense - buildings in older towns especially, would be made of similar if not identical materials, because that's what's available locally. For example, a little viking village on the edge of a pine forest would be built from ...yep...pine. No need to have 25 different textures for 25 buildings. One tileable pine diffuse map, normal map, & grunge map would cover the wood part all of those buildings. Simply add a small AO map that is unique to each building. 
  • F Pay attention to how the object you are texturing would actually be built. In the image above, I've made an attempt to fit the stone to the height of the steps. This takes some playing around in split screen (be sure to set your 3d view to change as you move the UVs around). The stone arch is textured so that it would come close to functioning as an arch in real life.
  • G Use specular maps on windows.